Tuesday 21 January 2014

Color correcting wedding clothes - or perhaps not

This is what the original photo looks like without color correction. I prefer this version, but I am probably the only one on the planet that does.
I like to prepare, and an excellent way to prepare for wedding shoots is to go to wedding conventions. It is also a great way to make new contacts, and perhaps land a job or two.

At a convention, you have no control over the light. That is pretty ok, because it leaves me free to focus on the moments that matter. In that respect, wedding photography (, wedding convention photography really, but the same idea applies), is like street photography: It is about capturing the moments that matter.

Then again, when you get back home and look through the photos, the little matter of color correction crops up.

The main lighting at the convention was quite yellow in color. The background lights where mostly green. This created an underwater feeling to the show. Not in a bad way. I liked it. A bit like a wedding in the halls of Poseidon.

The Poseidon statue outside the convention hall at Götaplatsen in Gothenburg. It may, or may not, have inspired the lighting scheme inside.
And yes, there is a very large Poseidon statue right outside the convention hall. I don't know if the lighting was designed to play on that, or not, but it did, and it worked. At least for me.

The lighting made the white clothes look quite yellowish, but it made the people look good. If I color correct and make the gowns white, the models will also look quite pale.

Now, if I color correct an entire photo in one go, I might get something like this (Click on the photo if you want a larger version):
Left: Uncorrected; Center: Quick white balance correction; Right: Levels adjustment


The leftmost photo is uncorrected, it's there just so you can compare the different versions side-by-side.

If you feel the need to color correct, which may be because you feel the need to have a happy client, or just to get paid, you have several options:

One option is to just change the white balance. In Aperture, you select Natural Gray in the White Balance adjustment, and click something that should be white or gray in the photo. A wedding dress is usually the right color, if you are shooting a wedding in Western Europe or the USA.

Take care to click an area that is not fully white. If you click a completely white area, the software algorithm won't know if the area is white because it was white in reality, or because it is overexposed.  results may be more interesting than you want.

Another option is to use a Levels correction on the red, green and blue color channels separately. That provides a bit more control. That is what I did in the rightmost of the three versions above.

But wait, there is more: So far we have corrected the entire photo in one go. What if we want to treat some parts, let's say the clothes, different from the skin?

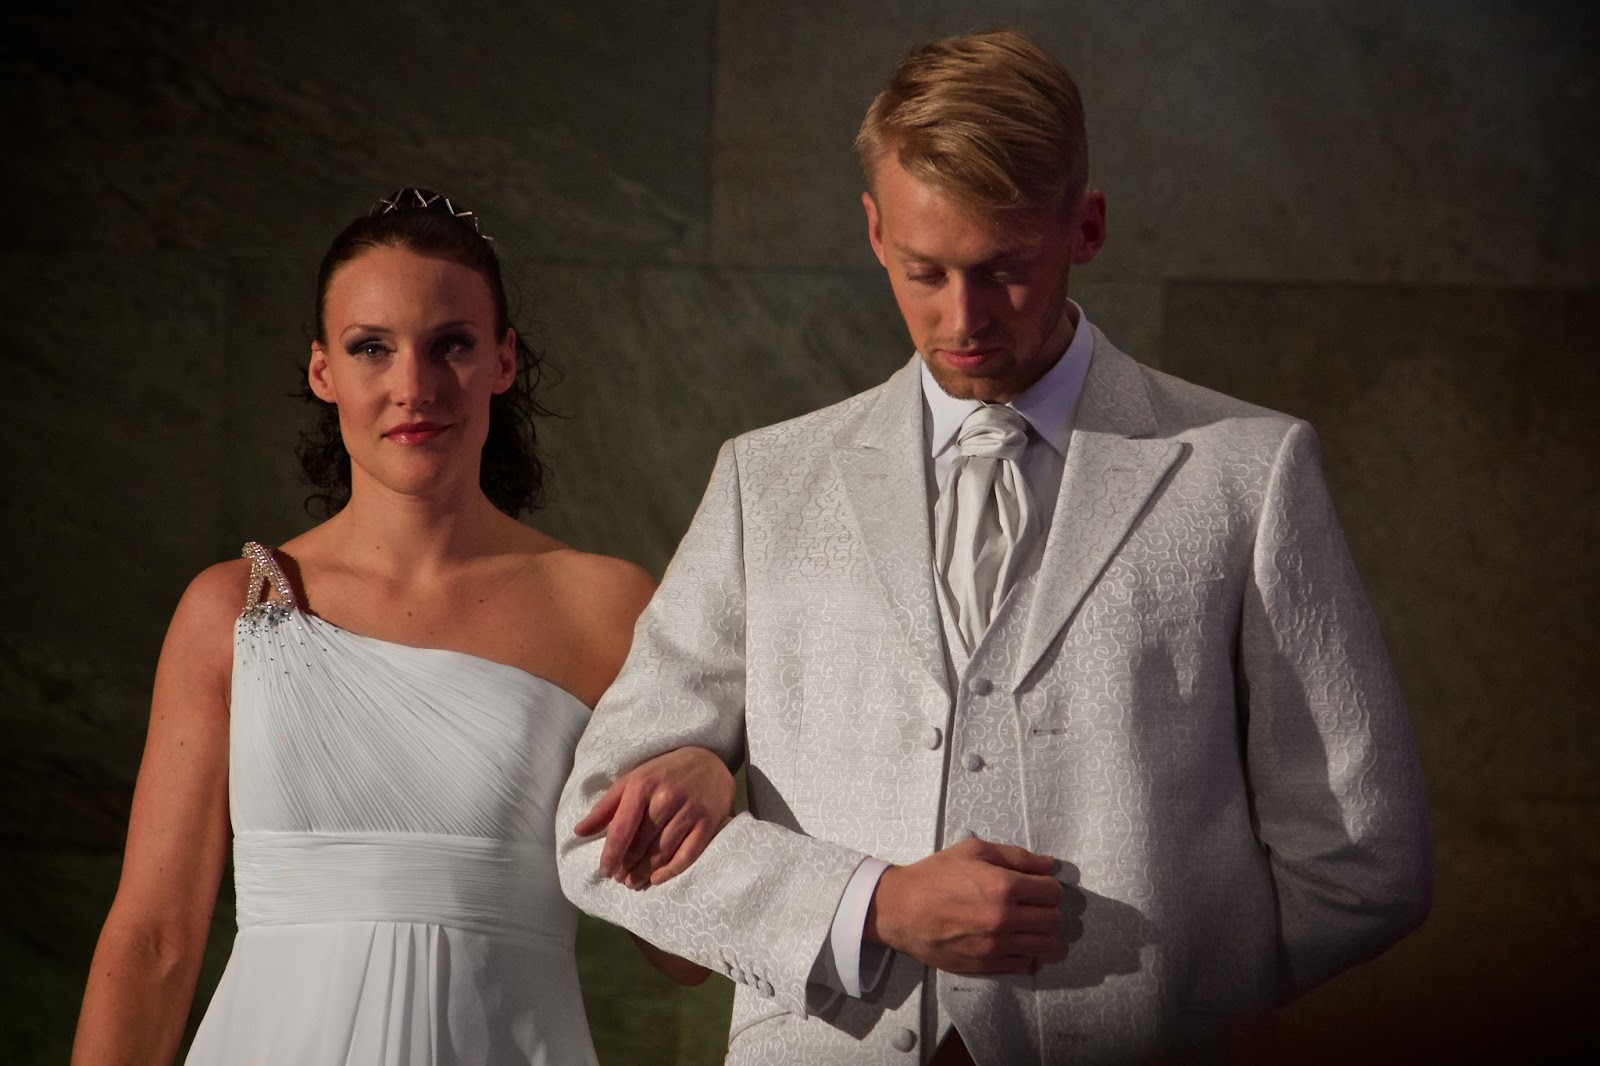
The wedding gown, the jacket, and the rest of the image have been treated separately.
I could bring the photo over to Pixelmator and separate parts of the photo into different layers. However, in this case, it was easier to continue working in Aperture.

I chose a saturation brush and used it to paint the wedding gown. Then, I created a separate Saturation adjustment, and painted the jacket. This allowed me to make her white dress just a tad more white than his white jacket.

However, the people who arranged the show went through a lot of trouble to put up green lights in the background, and warm yellow lights in the foreground, so the dresses looked anything but white during the show.

For a client, I would offer both color corrected and original versions, but since this blog is mostly about what I like, I have gone for the warmer colors. I like the underwater feeling. It's probably just because I know about the Poseidon statue outside, but still...

Here are some more photos from the show. No color correction, just the way it looked when I was there:

This photo is so green you almost get an underwater feeling. Imagine marrying in an underwater dome at a coral reef. Above your heads sharks are swimming, smaller fish are looking in... 


Friday 17 January 2014

It's been one of those days...


This morning I had no idea I would end up in a strait jacket before the day was over. Don't worry! It is just a test for an upcoming shoot.

Trying to put on a strait jacket by oneself is very, very difficult. Just as well I did not succeed, or managing the camera would have been well nigh impossible.

Given how difficult it is to get out of a strait jacket, I probably could not have written this blog post either. (Well, not really. The jacket is fake, the cloth is thin enough to rip to pieces if need be.)

Lighting the scene was very easy. I aimed one flash into the ceiling to create ambience, put a speed grid on a second flash, and aimed it at a point on the wall where I guessed my head would be.

You learn a lot from running tests like this, so it is not as crazy as it looks.

Backlight your headshots by shooting a flash through the backdrop


Along with the umbrellas, lightstands, and other whatnots, I am always carrying a bed sheet in my portable studio bag. I have written two articles on how to use the bed sheet to create a backlit silhouette, and how to use it in combination with a front light to create a film noir type high contrast image.


The bed sheet setup is the same as in the other two articles. As before, I ensure that the light hitting the bed sheet is spread very evenly by first shooting it through an umbrella.

The key light is also a shoot through umbrella. If you imagine the subject standing in the middle of a clock face and the camera being at 6 o'clock, the umbrella will be at 7:30. It is a bit higher than my head, and angled down.

I used an 85 mm lens, and had the camera mounted quite high. I shot at 1/80s, f/8.

A good headshot is about more than placing the lights and setting the camera. Shooting someone with glasses can be tricky. You want the subject to angle his head so that wrinkles on the neck are minimized.

Peter Hurley recommends doing that by "putting the forehead forwards", which is what I did in the shot above. When you do that, you have to take care so that the frames of the glasses don't cover the eyes. As you can see, I'm cutting it close in the shot above.

If you put the subject very close to the bed sheet, or large softbox if you prefer to use more expensive gear, you will get a wrap-around effect from the light. Photons move in straight lines of course, but some of them will move from the edge of the bed sheet at an angle such that they hit the side of the head and the upper part of the front side of the shoulders.

To help light the face evenly, I use two reflectors. The first reflector is a triangular silver reflector held at chest level, just out of frame. The second reflector is the white door on the subject's left side.

You work with what you have got. If there hadn't been a door there, I could have used a large piece of white paper, or a third flash on a low power setting.

The same subject, bed sheet and doorway as in the headshot. Everything else is different though.
I am continuously amazed by how you can deliberately create entirely diferent photos, and tell different stories, by changing the light, shooting angle, lens, posture and clothing.

As a photographer, I want to do it all. While you can certainly become very good at something if you specialize, you need to do a lot of different things if you want to be truly creative.

Now, it's time to shoot again.

Wednesday 15 January 2014

Film Noir: Lighting Eyes With a Pizza Box Gobo

A Film Noir style shot, backlit through a bed sheet, and lit from the front by shaping flash light with a pizza box. Very much in the spirit of a low budget noir style movie.

In a previous post I showed how to create a backlit Film Noir style photo using a bed sheet hung in a doorframe as a large softbox. That worked, but the resulting photo was a silhouette. A bit dark even for a noir style photo.

Lighting the eyes a bit would make the photo come alive. How do you do that with a hotshoe flash without also lighting the entire room, and destroying the deep shadows?

You need a thin sliver of light, aimed at the eyes. Since I did this in the middle of the night, I could not go to the photo store and buy an expensive light modifier. I had to get creative, and find something that could shape light the way I wanted.

A pizza box and some gaffer tape made an excellent light shaper.
A pizza box had the right size and shape, so I brought out the gaffer tape and used it to mount the pizza box on a flash. I put the flash, with a radio trigger, on a lightstand, and was ready to go.

The pizza box gobo in action. I added an extra piece of gaffer tape on the right side to eliminate some light that was hitting the wall instead of my eyes.
It took a couple of tries, but when I had adjusted the height of the lightstand, it was pretty easy to hit my eyes with the flash. I started with the flash on 1/64 of full power, and turned it up little by little.

Easy to do, took a couple of minutes, but it made a lot of difference to the photo. Check out the original silhouette version, and you will understand what I mean.

Tuesday 14 January 2014

Film Noir: Creating a silhouette with a bed sheet in a doorway

A bed sheet in a doorway makes a great softbox.
I held a flash photo tutorial at the Lerum Photo Club earlier this evening. We had a wonderful evening shooting a live model, gorillas(!), and dinosaurs(!!!).

I was asked to model too, not because of my looks, but because of my hat. I did not have time to shoot anything myself during the workshop, so when I came home, I decided to do a noir style shot before going to bed.

A bed sheet made an excellent diffuser. The softbox is the hallway.
The setup for the shot was very simple:

I used gaffer tape to fasten a bedsheet in my kitchen doorway. I put a flash and a white shoot through umbrella in the hallway. The idea was to get two layers of diffusion, first when the light from the flash goes through the umbrella, then when it hits the bedsheet.

I put a 30 mm lens on my camera, mounted the camera on a Gorillapod, a small tripod, tilted it, and angled it upwards. I used a radio trigger to set off the flash.

I used a shoot through umbrella as my first diffusion layer. This ensured that the light would spread evenly through the bed sheet. The same multilayer diffusion idea is used in many professional softboxes.
I darkened the kitchen, put the flash on half strength, and ran a few test shots. The trick is to remember that you can darken the kitchen by reducing the exposure time, without affecting the flash pulse at all. then you can increase the aperture to make the light from the flash more intense. Of course, you can also increase or reduce the ISO setting to get the overall effect you want.

In post, I used Aperture to increase the contrast a bit, and erase some reflexes from objects on the kitchen sink. I also cloned out a few tell-tale details on the toy gun. I bought it in a toy store, and if it is well lit, it does not look very dangerous at all.

By shooting from a low angle and tilting the camera a bit, I made the silhouette in the doorway look large and threathening. This is a trick you often see in old movies.

The hat and hiding the face in shadow also contributes to the feeling of danger.

Easy, and fun, and one more thing I can bring back to the Horror Noir project.

I also made a variant photo with my eyes lit. To do that, I needed a very narrow light modifier. I made it out of a pizza box. You can read about it here.